49Fifty
  • Home
  • Photo Gallery
  • 2015 Project
  • 2014 Project
  • Blog

Cleaning the Gunk off of a Glass Baking Dish

27/2/2014

2 Comments

 
This is one I have wanted to tackle for a while but at the same time was afraid to, thinking that there was no hope and it was going to take hours of scrubbing no matter what I tried. But there have been a number of posts floating around Facebook and Pinterest about people getting their baking dishes clean, so I thought I would finally give it a try.

Of course when it came time to do my research I could not seem to find all those wonderful posts. So I turned to Google....hurray for Google! After reading a couple of threads and putting together what I have learned so far this year on my crusade to clean, I came up with a plan.
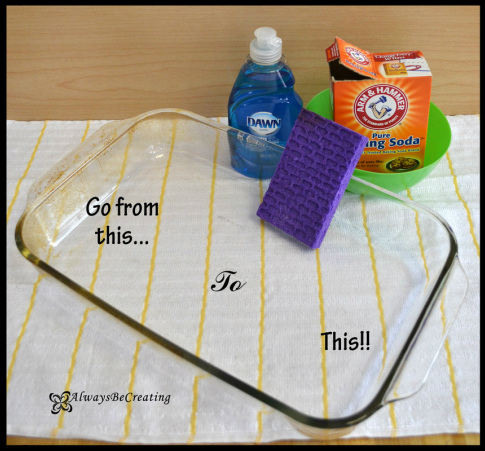
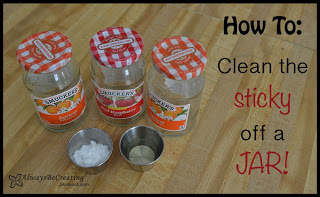
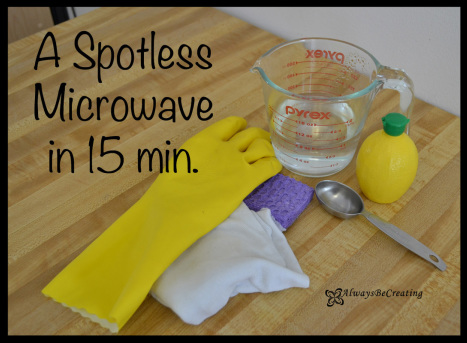
Here are ALL the items I used
Gross baking dish
Hot water
Dawn {the blue stuff}
Baking soda
Bowl
Sponge
Picture
Picture
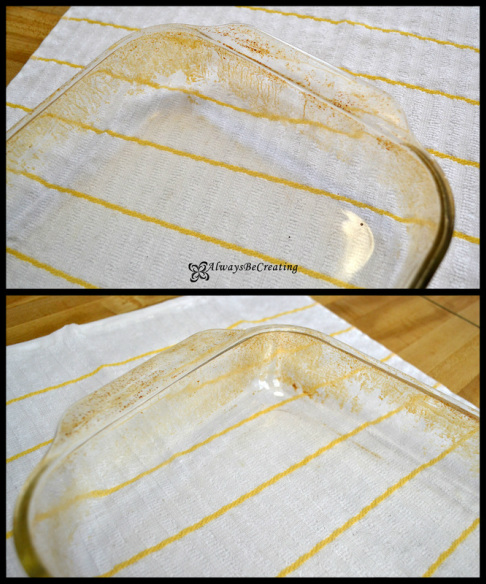
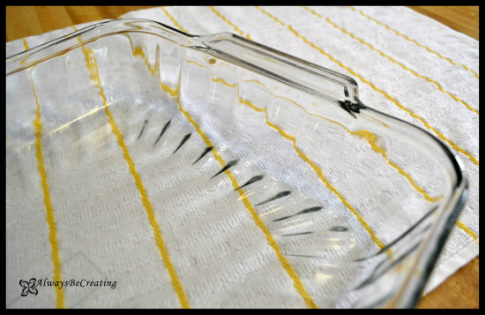
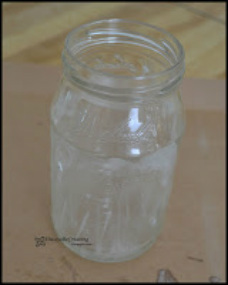
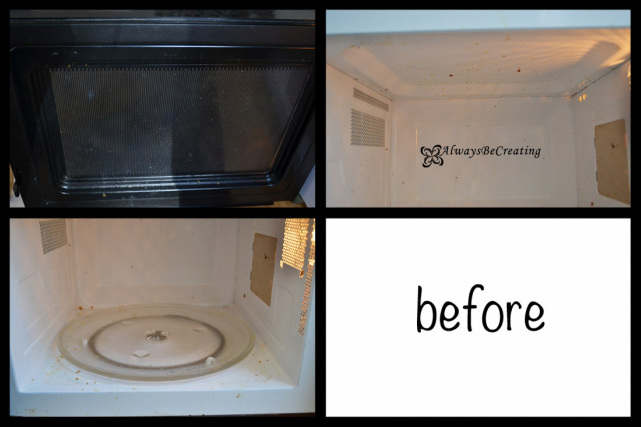
Here is a close up so you can see just how bad this dish really is.
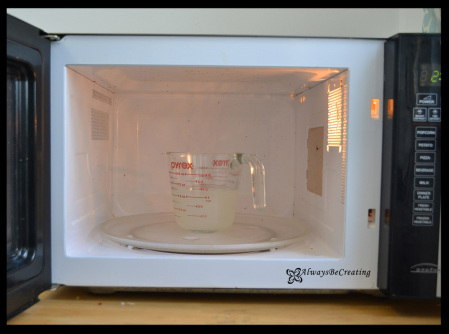
Turn on the faucet to the hottest water temperature you can, put some dish soap in to make it nice and sudsy {is that even a word} then let the dish sit and soak. I was only planning on an 30 minutes to an hour but our morning plans changed a bit so it soaked about 2 hours. It worked out fine because the water was so hot to begin with it stayed pretty hot by the time I got around to cleaning.

Now, pour some baking soda into a bowl so you can use it for dipping your sponge into. Get the sponge wet then ring it out, you just want it wet enough that the baking soda will stick to it when it is dipped in the bowl.

Go to town scrubbing!!!! Rinse off the dish every once in a while so you can see where to keep working on. I just used the soapy water that was already in the sink. No need to be wasteful. As I kept getting closer and closer looking at my dish in amazement as it came clean so easily, the thought came to me that I was happy this was working so well and I did not have to worry about breathing in any harsh chemicals.

A couple of tips:
The more paste like the baking soda is, the better it will scrub clean the dish. When you pull the dish out of the sink let as much water drip off as you can {no need to use a towel and dry it} and be sure to squeeze the water out of the sponge when you rinse it out.

Our sink is pretty small so only half of the baking dish could fit in and soak at a time. With the dish that was not as bad I went ahead and cleaned the whole thing. There was a bit of a difference in how much elbow grease was needed to clean the side that had not soaked. It still worked but took a bit of extra time. On my really bad dish, I gave up and will let it soak first.

We do not have a dish washer but I wonder if running the dish through the rinse cycle and taking it out before it dries would work. If you try this let me know how it goes.
Picture
Picture
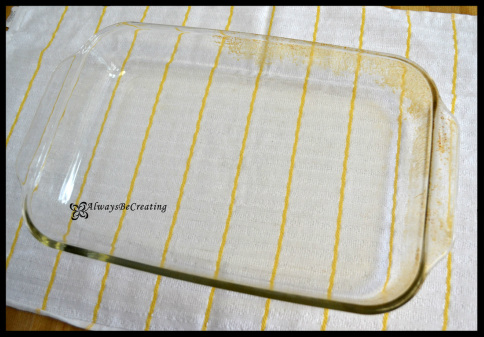
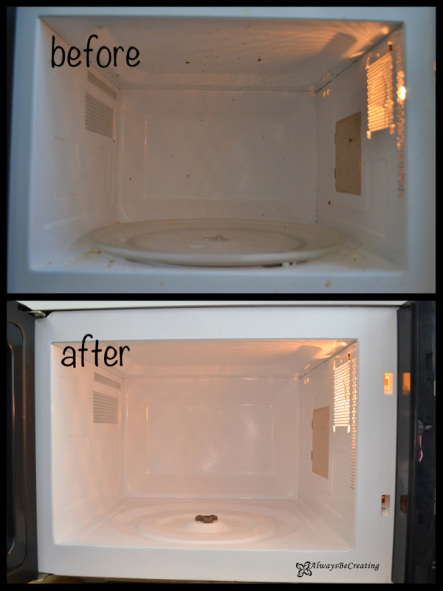
Are you seeing this. Look at how wonderfully this worked!!
Excuse the towel underneath my dish. When taking photos the gunky glass dish was blending in with the color of my table so I needed something that would have a better contrast.

Can you see the difference. I am so excited! I told my husband that now we can take dishes to Pot Lucks and not worry that people are judging our food by the look of our foggy-brown glass dishes any more.

I really was super surprised and pleased with how well and fast these dishes cleaned up. Watching as the baking soda paste turned brown grossed me out and made we want to jump for joy at the same time. My back is killing me from this pregnancy but I stayed at the sink on my feet for as long as I could before I had to give up. My back can rest up tonight and then I will finish the job tomorrow.
Picture
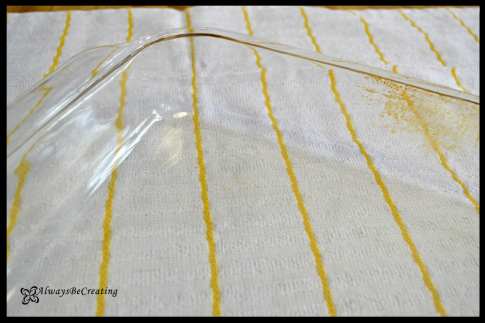
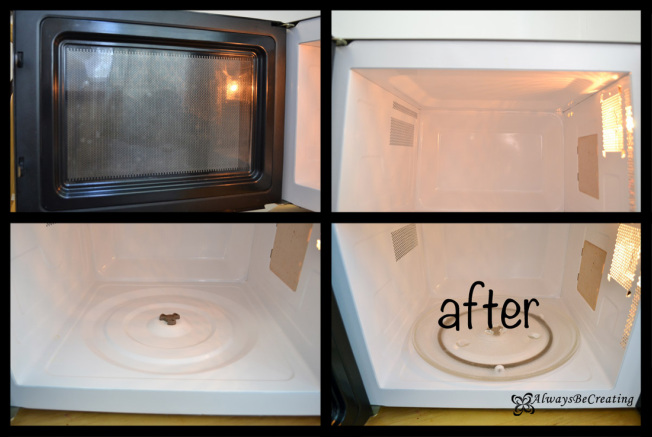
This was my first dish that was not quite as bad but look at it now. It looks brand new. I love it!!
2 Comments

Grandpa's Work Shed

26/2/2014

0 Comments

 
I shared with you that the inspiration for a year worth of cards was my Grandmother. She passed away before Christmas just over a year ago, one thing I remember everyone saying was how thoughtful my Grandma was and that they had already received their Christmas card from her.

Since then my mom and her two sisters have been taking turns going out to spend the evenings with my Grandpa. He suffers from dimensia and loosing his life time companion has been hard for him. Grandpa would love to sit and talk to you for hours about growing up and working for the railroad but his short term memory has suffered a lot. It is hard to look into someones eyes knowing that they recognize you, they know that they should be able to recall your name, but nothing comes to them.

Growing up I remember when my Grandpa built his work shed in his back yard. It was his own bit of space to do whatever he wanted, even if it was to sit there and not work on anything. He loved showing it off and how he had organized it, if there was a project going on he would definitley take you back to see it. This card is for my Grandpa and is designed after one of the many things that reminds me of him......a little red shed.
Picture
Here is a little tip about how I placed the stickers. I wanted them to be on the same row but I wanted to letters to be crocked. For this technique place a ruler {I like using a clear one so I can see everything under it as well} over the card where you want the letters to go. Place the letters along the edge of the ruler however you would like.

Lift the opposite side of the ruler up and as the stickers start to touch the paper use your finger to press down the tops of the stickers, then carefully pull the ruler away and press the rest of the sticker down firmly. It is as simple as that. The letters are all on there but look a little wind blown or crocked from the door opening and closing.
Picture
0 Comments

How to Clean the Sticky off a Jar

20/2/2014

0 Comments

 
This is one that I have on my main blog, AlwaysBeCreating, but it is a goodie and I just used it so I thought I would share it here. You can find the original post here or I have just re-posted on this site so all my cleaning tips are staying together in one place

I love finding new uses for jars. The hardest part is getting all the sticky off the jar that is left behind when taking the wrapper off. I am here to tell you that there is an easy way to get it off.

All you need is baking soda and some kind of cooking oil. For the second step I used dish soap and a simple dish sponge.
Picture
FIRST: Wash out the jar and take off as much of the label as will come off. This will make it so you only have to clean the sticky off once and not have to fight the paper label.

I mixed equal parts baking soda and oil then rubbed the mixture all over the jar. If exploring the Internet has taught me anything, it is that baking soda can clean most anything. The oil helps spread it on the jar.
Let the jars set for about 10-20 minutes.
Picture
SECOND: Put a bit of soap on the jar and use the sponge with a bit of water to wash off the paste. The sponge helps rub the sticky off and the soap is to clean the oil from the jar.
Now spray the lids some fun colors and use them How ever you would like. ENJOY!!
Picture
0 Comments

Box Tops for Education.....For our Niece and Nephew

19/2/2014

0 Comments

 
This is a bit of a different one from a traditional card. My little one is only two and has some time before starting school but I still keep all of our Box Tops so we can send them to our niece and nephew who take the competition at school very serious. They have both been in classes that have won for their different grades a couple of times and get so excited about it. I also love it because I get to help them do something they want but I do not have to break the bank.
Picture
I love when a project is completed and it turns our just as good or better than I had it imagined in my head. Well, this is one of those projects, I love how they turned out. After spending some time playing around with the program I still have not figured out how to save an .SVG file from Silhouette Studio, instead I have a BoxTopsTent.studio file for you to download from here to make a little packet for your kids to take their Box Tops to school. The different lines are colored differently so you can see what's-what.
Items used:
Silhouette Portrait
Cutting File
Glue dots
Pink & Black Staedtler pens
Metallic Silver Sharpie
PLEASE let me know if the file does not work, this is my first time trying to share a file and I would hate to find out it never worked and I didn't know it.
0 Comments

A Spotless Microwave in 15 Minutes

13/2/2014

2 Comments

 
Do I ever have a great one for you today. How long do you usually put into cleaning your microwave and how clean do you get it. Do you usually stop at 'clean enough?'

Today we are talking about how to clean the microwave and, as always, how to spend as little time as possible doing it. The hard thing about this year long challenge that I did not take into account is that I would be showing you just how bad things get around here, sometimes on purpose so I have a good before and ofter photo but that is not always the case.
What you will need
Microwave safe bowl or cup
1 Cup water
Either lemons/lemon juice, vinegar or baking soda
Rag or sponge
Cleaning gloves {optional}
Microwave
Picture
First do a quick wipe down inside the microwave. This will get all the loose crumbs out of there so you can focus on the grease and grim.

In the microwave safe dish, I used a glass measuring cup, add one cup water and about 3-4 Tbls lemon juice {or fresh lemon wedges}. You could substitute  this will a cup of vinegar or 3-4 Tbls baking soda.

Place it in the microwave for 3-5 minutes, this will depend on the strength of your microwave but it needs to be long enough that the water will boil. Mine was set for 5 minutes because we had a couple of things overflow and it has been a while since the last deep clean. As the water boils the steam mixture will attach onto the grease and gunk and loosen it right up. The acid in the lemon juice or vinegar will also help to disinfect.  
Picture
After the time is up let it sit for a few minutes {5-10}. Go grab yourself a snack or just sit and read a couple pages in your book of the month. I went had myself a yogurt then did a row or two in the blanket I am crocheting for Lady #2.

Now to simply wipe out the microwave and watch in amazement as EVERYTHING comes right off. Remember, you just boiled the water, even after sitting for a few minutes it is still going to be super hot, so use caution. Use the rag or sponge and get it wet using the water mixture that just came out of the microwave to wipe down the inside. At the very end I wiped it down with just warm water to get any excuse lemon juice residue off.

That is it, it is really that easy. This time I used lemon juice and it worked GREAT! Seriously from start to finish, getting everything out and cleaning out the rag and sponge, it took me 15 minutes and NO SCRUBBING was involved. Go ahead and make a mess in your microwave so you can try out this cleaning tip and see how easy it is for yourself.

I did not want to deal with the fumes from boiling the vinegar like I did when I cleaned the drip pans and I need some more baking soda but when I get around to testing these other two options out, I will let you know.
Picture
I did not want to show the close ups of the before because of how bad things really were in there but that is really the best way for me to show you how wonderful this little trick is. I am still so pleased with myself every time I go to use the microwave and see the shinny white inside.
Picture
Picture
2 Comments

Thanks Coach

12/2/2014

2 Comments

 
I am lucky enough to be in the Young Women's Presidency in our ward and I love serving all of our girls.

Last weekend there was a youth volleyball tournament and we, as leaders, were at a bit of a loss. Two of us are in our third trimester and a couple had previous things going on so they were not able to coach or be at the game. We had another lady step up and be the coach for our youth. She put in a couple of weekends and jumped right in helping them with technique and communication. 

Here is a card from all the youth to say Thanks to her {and her family} for putting in the time to help when the leaders were unable.
I backdated this post a couple days even through it is just being published. We had a snow storm that cancelled church on Sunday so I needed to wait until there was a chance for the youth to sign it and she is one that checks out all my posts so I did not want to ruin the surprise.

Ok. Our Youth activity was cancelled tonight because of the snow so I am going to go ahead and post this and my friend will just have to act surprised when we give it to her.
Picture
Picture
A quick tip on how I aligned my lettering.

I wanted to make sure my lettering lined up just how I had it cut so I took the cut out of 'Ashford Youth' and placed it on the card right where I wanted to lace my lettering. As I placed a small amount of glue on each letter I placed them  back into the cut out. Make sure not to get too much glue on your letters because it will spread when you push the letter down and glue it to the cut out that will be lifted off at the end. Also, if there is a tricky letter like an 'S' simply tear out the inner parts because you really only need to get the outside edges lined up and the rest will site perfectly. This will help so there will not be so many small places for the glue to adhere to the wrong thing.

For the second photo I tried to get one where the flash really bounced off of it so you could clearly see how I had laid the letters into the cut out.

Update: I was so worried about our activities being cancelled a lot lately I forgot to mention what I used and where you can get it. The shapes and letters were cut out on my Silhouette Portrait and the volleyball shapes can be found here, in their online store. The font for 'Ashford Youth' was just a random one I had on my computer.
Picture
2 Comments

Review ~ Mean Green

8/2/2014

0 Comments

 
This post is coming a couple of days late so I'm sorry for that. This week have been a very long one {pregnancy wise} and I fell a bit behind.

But good news....a dollar store opened up down the street from me so I have some place to get milk and cheap little toys for Lady A. Today was their grand opening and the first {some number I do not remember} 100 or so customers got a goodie bag. So I took my $5 off coupon I received in the mail and headed in to start my stock pile of diapers for Lady #2 who gets here in April.

In the goodie bag was a pen {another pen is that last thing I really needed}, a reusable shopping bag, spray cleaner and a rag for the cleaner {after opening it, turns out it was a shirt that I then cut up into a rag}.
Picture
I thought I would give the cleaner a try and let you all know how I liked it. The label says "Cleaner & Degreaser" and I had the perfect spot to try this on....the range hood!!!

Armed with Mean Green and my new rags I headed to the hood. At first I noticed a lack of a strong chemical smell, this is great since I am super sensitive to that stuff right now. First I used it to go over the loose stuff first then I would make a second pass to really get in and clean the stuck on grease off. The first swipe was pretty good and I was able to get stuff up with little effort. When it came time to clean the grease off I let the pray sit for a minute to really let it work in. The rag was not working well to scrub so I grabbed a brush and went to town. Some came up but it was not as easily as I was hoping when using a cleaner that states on the bottle
"Cleaner & Degreaser" and says it is commonly used on range hoods. The other big problem with a spray cleaner is that it runs and drips all over the place.

So I have decided I will keep it around to clean counter tops and garbage cans {it was free after all} but it was not effective enough to become a regular item in my cleaning bucket.
0 Comments

Thank You

5/2/2014

2 Comments

 
I was in the Young Women Presidency at church and we were recently released. I was very anxious and hesitant about accepting this calling, the last time I served in YW's it was not the best experience. No laundry will be aired here, but it was enough that I almost turned down the calling this time.

I am so glad I accepted it!!!


Our President was great! She made me feel so accepted and seeing how much she cared for and loved the girls helped set the standard for everything we did as a Presidency. So, I needed to write her and make sure I let her know how much I appreciated her love and example.
Picture
I went without a filter on the image because I wanted to try and show the true colors of this card. I love the yellow and blue together.

The flower is an image from a piece of cardstock that I cut out with an x-acto knife. It took a bit of time but I love how it turned out. Glue Dots and Glue Strips were used to place the flower and help it pop out from the background.
2 Comments

    Author

    Write something about yourself. No need to be fancy, just an overview.

    Archives

    January 2015
    October 2014
    April 2014
    March 2014
    February 2014
    January 2014

    Categories

    All
    2014
    Baby
    Bathroom
    Cards
    Carpet
    Cleaning Tips
    Cleaning Tips
    Crayon
    Family
    Floor
    Glass
    Happy Birthday
    Holiday
    Homemade Cleaning Solution
    Invitations
    Kitchen
    Nail Polish
    Review
    Sink
    Thank You
    Thinking Of You
    Toys
    Valentine
    Window

    RSS Feed


Powered by Create your own unique website with customizable templates.