Silhouette Portrait
Cutting File
Glue dots
Pink & Black Staedtler pens
Metallic Silver Sharpie
This is a bit of a different one from a traditional card. My little one is only two and has some time before starting school but I still keep all of our Box Tops so we can send them to our niece and nephew who take the competition at school very serious. They have both been in classes that have won for their different grades a couple of times and get so excited about it. I also love it because I get to help them do something they want but I do not have to break the bank. 
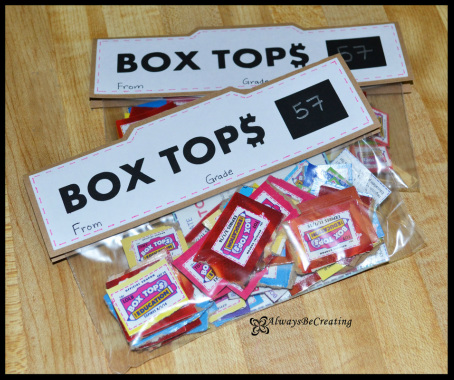
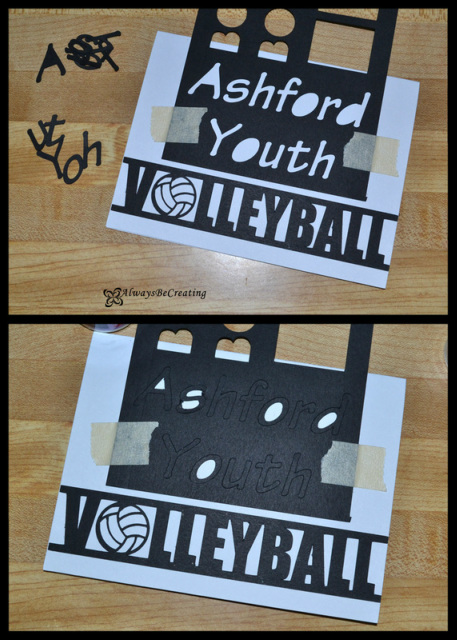
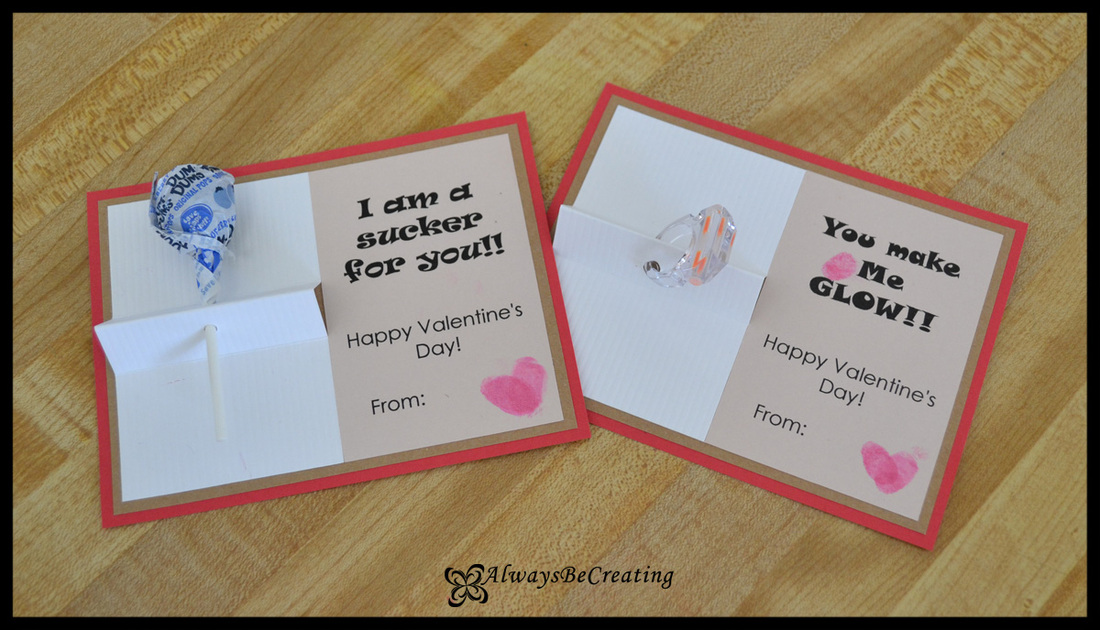
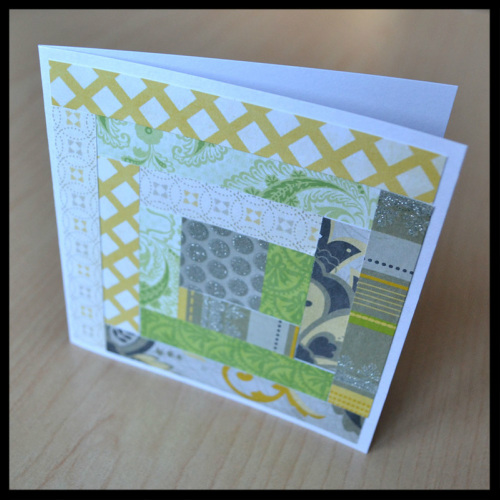
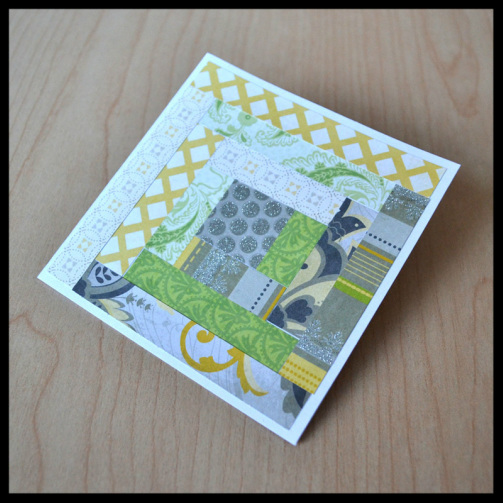
I love when a project is completed and it turns our just as good or better than I had it imagined in my head. Well, this is one of those projects, I love how they turned out. After spending some time playing around with the program I still have not figured out how to save an .SVG file from Silhouette Studio, instead I have a BoxTopsTent.studio file for you to download from here to make a little packet for your kids to take their Box Tops to school. The different lines are colored differently so you can see what's-what.
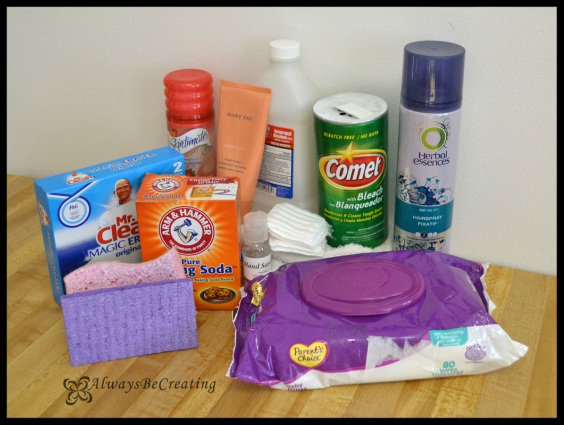
 Items used: Silhouette Portrait Cutting File Glue dots Pink & Black Staedtler pens Metallic Silver Sharpie PLEASE let me know if the file does not work, this is my first time trying to share a file and I would hate to find out it never worked and I didn't know it.
0 Comments
Do I ever have a great one for you today. How long do you usually put into cleaning your microwave and how clean do you get it. Do you usually stop at 'clean enough?' Today we are talking about how to clean the microwave and, as always, how to spend as little time as possible doing it. The hard thing about this year long challenge that I did not take into account is that I would be showing you just how bad things get around here, sometimes on purpose so I have a good before and ofter photo but that is not always the case. What you will need Microwave safe bowl or cup 1 Cup water Either lemons/lemon juice, vinegar or baking soda Rag or sponge Cleaning gloves {optional} Microwave First do a quick wipe down inside the microwave. This will get all the loose crumbs out of there so you can focus on the grease and grim. In the microwave safe dish, I used a glass measuring cup, add one cup water and about 3-4 Tbls lemon juice {or fresh lemon wedges}. You could substitute this will a cup of vinegar or 3-4 Tbls baking soda. Place it in the microwave for 3-5 minutes, this will depend on the strength of your microwave but it needs to be long enough that the water will boil. Mine was set for 5 minutes because we had a couple of things overflow and it has been a while since the last deep clean. As the water boils the steam mixture will attach onto the grease and gunk and loosen it right up. The acid in the lemon juice or vinegar will also help to disinfect. After the time is up let it sit for a few minutes {5-10}. Go grab yourself a snack or just sit and read a couple pages in your book of the month. I went had myself a yogurt then did a row or two in the blanket I am crocheting for Lady #2. Now to simply wipe out the microwave and watch in amazement as EVERYTHING comes right off. Remember, you just boiled the water, even after sitting for a few minutes it is still going to be super hot, so use caution. Use the rag or sponge and get it wet using the water mixture that just came out of the microwave to wipe down the inside. At the very end I wiped it down with just warm water to get any excuse lemon juice residue off. That is it, it is really that easy. This time I used lemon juice and it worked GREAT! Seriously from start to finish, getting everything out and cleaning out the rag and sponge, it took me 15 minutes and NO SCRUBBING was involved. Go ahead and make a mess in your microwave so you can try out this cleaning tip and see how easy it is for yourself. I did not want to deal with the fumes from boiling the vinegar like I did when I cleaned the drip pans and I need some more baking soda but when I get around to testing these other two options out, I will let you know. I did not want to show the close ups of the before because of how bad things really were in there but that is really the best way for me to show you how wonderful this little trick is. I am still so pleased with myself every time I go to use the microwave and see the shinny white inside.
I am lucky enough to be in the Young Women's Presidency in our ward and I love serving all of our girls. Last weekend there was a youth volleyball tournament and we, as leaders, were at a bit of a loss. Two of us are in our third trimester and a couple had previous things going on so they were not able to coach or be at the game. We had another lady step up and be the coach for our youth. She put in a couple of weekends and jumped right in helping them with technique and communication. Here is a card from all the youth to say Thanks to her {and her family} for putting in the time to help when the leaders were unable. I backdated this post a couple days even through it is just being published. We had a snow storm that cancelled church on Sunday so I needed to wait until there was a chance for the youth to sign it and she is one that checks out all my posts so I did not want to ruin the surprise. Ok. Our Youth activity was cancelled tonight because of the snow so I am going to go ahead and post this and my friend will just have to act surprised when we give it to her. A quick tip on how I aligned my lettering.
I wanted to make sure my lettering lined up just how I had it cut so I took the cut out of 'Ashford Youth' and placed it on the card right where I wanted to lace my lettering. As I placed a small amount of glue on each letter I placed them back into the cut out. Make sure not to get too much glue on your letters because it will spread when you push the letter down and glue it to the cut out that will be lifted off at the end. Also, if there is a tricky letter like an 'S' simply tear out the inner parts because you really only need to get the outside edges lined up and the rest will site perfectly. This will help so there will not be so many small places for the glue to adhere to the wrong thing. For the second photo I tried to get one where the flash really bounced off of it so you could clearly see how I had laid the letters into the cut out. Update: I was so worried about our activities being cancelled a lot lately I forgot to mention what I used and where you can get it. The shapes and letters were cut out on my Silhouette Portrait and the volleyball shapes can be found here, in their online store. The font for 'Ashford Youth' was just a random one I had on my computer. This post is coming a couple of days late so I'm sorry for that. This week have been a very long one {pregnancy wise} and I fell a bit behind. But good news....a dollar store opened up down the street from me so I have some place to get milk and cheap little toys for Lady A. Today was their grand opening and the first {some number I do not remember} 100 or so customers got a goodie bag. So I took my $5 off coupon I received in the mail and headed in to start my stock pile of diapers for Lady #2 who gets here in April. In the goodie bag was a pen {another pen is that last thing I really needed}, a reusable shopping bag, spray cleaner and a rag for the cleaner {after opening it, turns out it was a shirt that I then cut up into a rag}. I thought I would give the cleaner a try and let you all know how I liked it. The label says "Cleaner & Degreaser" and I had the perfect spot to try this on....the range hood!!!
Armed with Mean Green and my new rags I headed to the hood. At first I noticed a lack of a strong chemical smell, this is great since I am super sensitive to that stuff right now. First I used it to go over the loose stuff first then I would make a second pass to really get in and clean the stuck on grease off. The first swipe was pretty good and I was able to get stuff up with little effort. When it came time to clean the grease off I let the pray sit for a minute to really let it work in. The rag was not working well to scrub so I grabbed a brush and went to town. Some came up but it was not as easily as I was hoping when using a cleaner that states on the bottle "Cleaner & Degreaser" and says it is commonly used on range hoods. The other big problem with a spray cleaner is that it runs and drips all over the place. So I have decided I will keep it around to clean counter tops and garbage cans {it was free after all} but it was not effective enough to become a regular item in my cleaning bucket. I was in the Young Women Presidency at church and we were recently released. I was very anxious and hesitant about accepting this calling, the last time I served in YW's it was not the best experience. No laundry will be aired here, but it was enough that I almost turned down the calling this time. I am so glad I accepted it!!! Our President was great! She made me feel so accepted and seeing how much she cared for and loved the girls helped set the standard for everything we did as a Presidency. So, I needed to write her and make sure I let her know how much I appreciated her love and example. I went without a filter on the image because I wanted to try and show the true colors of this card. I love the yellow and blue together.
The flower is an image from a piece of cardstock that I cut out with an x-acto knife. It took a bit of time but I love how it turned out. Glue Dots and Glue Strips were used to place the flower and help it pop out from the background. RED!! Are you kidding me?! Red nail polish on the carpet. Red crayon, red pen and now red nail polish. Obviously this cleaning tip came about from necessity just a couple of days ago. Lady A and I were painting each others nails and she got RED nail polish on the carpet!! Red anything always seems to smear whenever you have to clean it up. My first reaction was to take nail polish remover to it - as expected, that smeared it everywhere. I went to my bucket of cleaning supplies and grabbed the Scrubbing Bubbles with Bleach and a soft bristle brush. I was not worried about the bleach because the carpet consists of man-made synthetic fibers and with a soft bristle bush on Berber carpet it would not mat as I brush the cleaner around on the carpet. ACT FAST!!! This is key, the nail polish was still wet while I was trying to clean it.
Spray the Scrubbing Bubbles right on the nail polish and then scrub in a circular motion with the brush. I am not going to lie, I thought we were toast, but after just a few minutes of scrubbing the stain was gone. I mean, ALL the way gone!!! If I wasn't so large from pregnancy I would have jumped up and done a happy dance. Now spray with a water bottle and blot dry. This will help bring up the chemical from the cleaner that are in the carpet. Do's: Act as soon as you notice it. The longer it is on the carpet the more it will set in. If you have a second try the cleaner on a spot of carpet that is out of sight to make sure that it is color safe. Because I know not everyone is renting and has nasty berber carpet on their floor, I have also put together a list of tips from others who have had great success with other cleaners.
Glow rings and suckers! Instead of waiting until the last minute, when Valentine Cards would be on sale for 70% off, I decided to do homemade cards for Lady A's friends. These kids are all toddler age so the cards needed to have something that would minimize the sticky mess mom and dad would have to clean up. I am so excited about how cute these turned out and they were super easy. You'll need cardstock in four different coordinating colors. Color one: cut the 8 1/2"x11" into four equal pieces {4 1/4"x5 1/2"} Color two: cut into pieces 4"x5 1/4" Color three: Print then cut 3 3/4"x2 1/2 Download the PDF here. Color four: 4 1/4"x2 1/2" With the pieces printed and cut it is time to get fourth piece ready for the suckers and rings. Fold right sides together 1 1/2" from top then repeat from bottom. Fold in half in the opposite direction. Place a hole, big enough to fit your item, between the top and center folds, repeat for bottom hole. Note: Cardstock can be hard to fold and make sure that the crease ends up in the right place. I simply placed a ruler where I wanted the crease to be then took an orange peeler {anything with a solid corner will work} and ran it down the side of the ruler. I used a nifty little setter kit that my mother-in-law got me from Provo Craft. It has three different hole punch sizes and two of them worked perfect for this project. Now layer and glue everything together. You could add brads, chalk, ribbon or any other embellishments that you would like. I had Lady A do finger print hearts since she is still a bit little to write her name. If your toddler is anything like mine, there will be extra finger prints too, this just adds to the handmade feel. I would suggest keeping a wet wipe or paper towel handy to clean up any messes that happen.
We have had our first experience with cave drawings {toddler art} on our walls. There is crayon and ball point pen. My initial reaction was to gasp and wonder how long it has all been there, then to talk to her about why we do not draw on the wall but at the same time it is another milestone. Lady A is exploring her creative side and where better to do that than a big white wall. It is a blank canvas! How can I be too upset with her as she is learning, growing and exploring all that she can do. To clean the crayon {which is also a red, one of the hardest colors to clean up} I did a little bit of searching for tips on what others have tried. This site has a long list of different ideas. I do not have enough crayon on the wall to try them all out so I went with what I had on hand and what I felt would work best. The two most important suggestions are act fast and try a test spot on the wall first. The longer the color sits on the wall the more it can soak into the paint which will require more scrubbing and lead to removing paint. Test the solution you are going to try on part of the wall that is behind a piece of furniture, a frame or art piece on the wall or in a discrete area. I tried all these that I had around the house. The baby wipes took off top layer or the crayon but also smeared the color. Then I tried the hand lotion, shaving cream, hair spray baking soda and hand sanitizer. They all worked pretty well at taking the top bulk of the crayon off but still left color behind. Here is what I ended up doing. First clean with Lysol wipes or Comet on a damp sponge. {The Comet I had on hand had bleach in it, which actually worked well to help clean the white walls.} This will take most of the crayon color and wax off. Then place rubbing alcohol on a rag or cotton square. I quickly rubbed it over the crayon or ink then when back over it with a bit of elbow grease. Be careful not to scrub too hard or to let the wall get too wet with the rubbing alcohol, it can bring up the paint. I will say that I was super excited with how well the crayon and ink came up with the rubbing alcohol. I can only imagine how well it would work if I had caught it all when Lady A first marked up the walls. Here is a link for ideas on cleaning toddler cave drawings from wall paper. Keep in mind that it is wall PAPER so if it gets too damp, the color and paper can rub off as you are trying to rub off the ink.
The Mr. Clean Magic Eraser is always a go to for things like this. Be sure to take care when using this, too much rubbing will lift the paint from the wall. Which ever method you go with, act fast! Part of me wonders if some of the other techniques would have worked if I had noticed the drawings and cleaned them up right after Lady A had left them. Other sites I looked up are Suite101, SiimplyStated and Hub Pages. My cousin and her family have moved out of the country for her husbands work. We used to talk all the time, some of those phone calls would last hours. It didn't matter how short we were planning on making the call, we could always find something to talk about. Phone calls are not so easy now, are are in completely opposite timezones, but I want to keep in touch with her and let her know that I am thinking of her.
She is a very gifted quilter, one of my favorite quilts is one that she made for me as a gift when I came home from my mission. The cover of the card is designed after the Log Cabin pattern. I have never thought about cleaning bathtub toys....they sit in the clean water with the kiddos....but I noticed a little build up on some of Lady A's bath toys so it is time to get working on cleaning them. After all they are in the bath to get clean, it does not make sense to have them play with dirty toys. Plug the holes for those that squirt water or have squeek holes. The kiddos might not be too happy about this but it will save you a lot of work and mold in the long run. Simply use hot glue to place a water proof seal on those toys. Here are a couple of options to cleaning those toys that can help keep bath time a little bit easier:
Just a couple of thoughts....
|