Packing up and moving in the Spring happend fast with everything else we had going on. One of my goals was to go through all of our boxes and get rid of things we didn't need/want and make sure we were not wasting space by packing a bunch of air. After moving so many times I stopped worrying about trying to open every box when we moved in some place new, it was also hard because we seemed to keep moving into places that were smaller than the last.
Well we moved into the biggest place we have ever been in, a cute little farm house a couple miles away from the University where Paul is teaching. The goal was to open every box and make sure we weren't holding onto un-needed items.
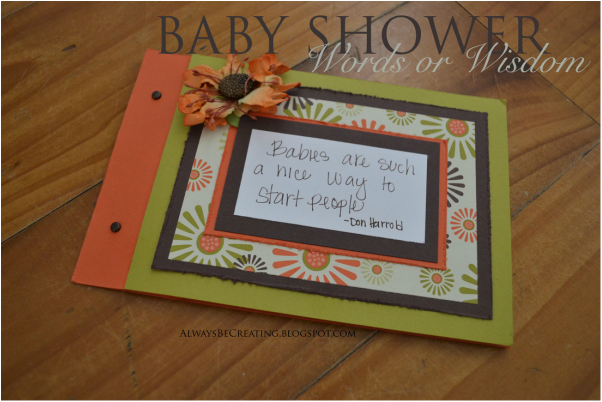
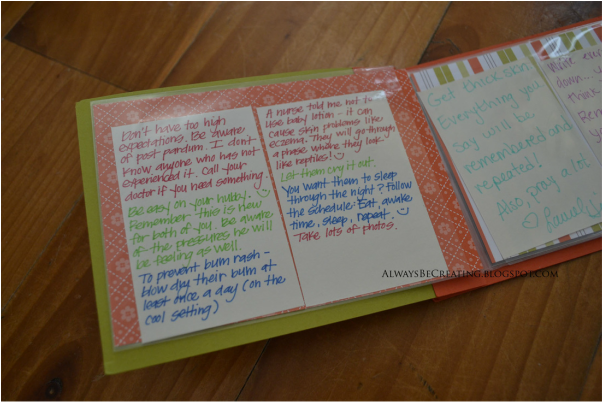
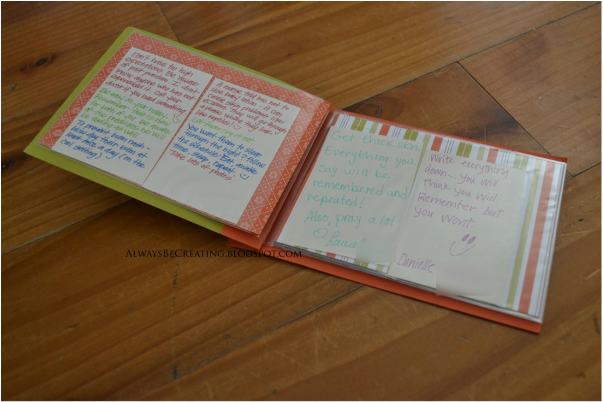
In doing so I came across this cute little card full of thoughts and advice from the family and friends at my baby shower for Lady A {there are some cute ones for Miss E as well but I put those in a safe spot, you know, so they won't get lost or ruined, and now I just need to remember where that was. Am I the only one that does that?}.
Well we moved into the biggest place we have ever been in, a cute little farm house a couple miles away from the University where Paul is teaching. The goal was to open every box and make sure we weren't holding onto un-needed items.
In doing so I came across this cute little card full of thoughts and advice from the family and friends at my baby shower for Lady A {there are some cute ones for Miss E as well but I put those in a safe spot, you know, so they won't get lost or ruined, and now I just need to remember where that was. Am I the only one that does that?}.
Even since I did not make it I thought I would try to put together a list of supplies and tools needed to create this.
MATERIALS/SUPPLIES
Solid and Patterened Card Stock
4"x6" Picture sleeves like the ones here or click the link for different sizes.
Decorative Brads
Decorative Embelishments
Archival pens like these ones
TOOLS
Paper cuter {this is the one I use. It travels well and is great for projects that require simple straight cuts}
Small Hole punch/needle {pretty much anything that will help puncture the layers of paper and page sleeves so the brads can be placed}
Glue/Double Sided Tape
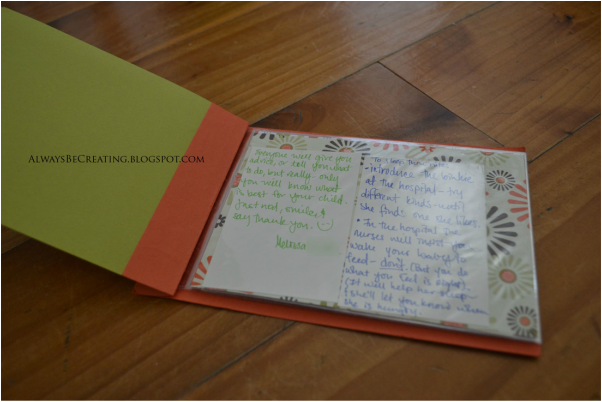
It is such a cute idea and full of great advise from people I love, that I wanted to share with you. My SIL put this together ... I do love that there are so many wonderfully creative people in my life.
I hope you enjoy and that it inspires you on your journey to create.
I would love to hear from you and see your projects. Leave a comment or #AlwaysCreate on your photos. Find me on Instagram {@AlwaysCreate} and follow along for behind the scenes and fun little extras.
 RSS Feed